Friday, March 4, 2011

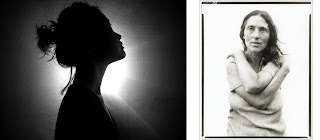
Faceless Self-Portrait


Now that you have brainstormed a few portrait ideas, it's time to shoot a roll of film and see how they turn out! Here's how to approach this:

1) Clarify your sketchbook ideas, and for each example you'd like to recreate: Identify the type of light you will use, (incandescent/studio lights vs. natural light/daylight), and if you decide to use studio lighting, create an illustration that shows your set-up: where will the camera, light source, and fills (if-necessary), be placed?

2) Consider equipment: What lights will you use, do you need a white/black background? Will you need a tripod?

3) Shooting tips: Partner up with a friend in class to help you with your set-up and to shoot your portraits. Use your sketchbook as a guide for explaining what you want. Nervous about shooting film? Use your digital camera first to see how successful your lighting and composition looks, and then shoot with film when everything looks good. Remember, slow exposures using shutter speeds slower than 1/30th of a second will be blurry if you hand-hold the camera! Check to make sure your focus is accurate as well!

4) Remember your shooting objective: You're creating a self-portrait that expresses how you would like to be seen, or how you think others might see you. Be creative with lighting, use of props, and most importantly composition! Remember, this portrait does not have to show your face, be thoughtful in how you choose to represent yourself! (Check out the slideshow below for additional ideas!)

Thursday, March 3, 2011

Self-Portrait

photo by Jen Liu

For our next shooting assignment, we will explore a very popular photo subject: portraiture. Portraiture is exciting because in photography, it can become very expressive. Using light/shadow, composition, filling the frame, etc. can present a person in unique and meaningful ways.

Over the next few days in class, I will teach you a few basic, but important, lighting techniques that portrait photographers use to create dynamic images. You will then apply these techniques in the ways you want to, working with a small group of friends in class to shoot a self-portrait of your own design. Before you begin shooting portraits in class, you need to have a plan for what you'd like yours to look like. To begin, we'll keep the composition simple, shooting only from the waist up. If you like how your portrait turns out, you can just go ahead and use it for critique later. If not, you can reshoot it outside of class on your own.

Here's what I'd like you to have prepared for our portrait lighting demo in class on Monday, March 7(Period 4A) and Tuesday, March 8 (Period 4B)nd:

1) Look through the slideshow below and find an inspiring portrait examples you really like. Sketch or print/paste at least two examples in your sketchbook. Select a portrait that you like for its quality of light/shadow, and one you like for its composition. Make sure to choose images that aren't too crazy or complex to recreate, choose compositions that focus on the head, or from the waist up. You may also look elsewhere...check out Flickr groups, artists websites, or other books/magazines for compositional/lighting ideas.

2) Make a list of three adjectives that best describe you, words that accurately describe your character. Be specific, and explain why these words best describe you.

3) Illustrate and explain/describe a self-portrait proposal. In the proposal, make sure to include the following:
-Illustrate the kind of composition you would like, the special clothing or props you will need, or lighting techniques you will like to use, (we'll talk about them in class).
-Explain what this portrait will express about you as a person. Consider your descriptive adjectives and inspiring examples you find.

You will share this proposal next week with your group who will then help you shoot it. The clearer your proposal, the easier it will be to explain your idea to your group. Come to class on Monday prepared!