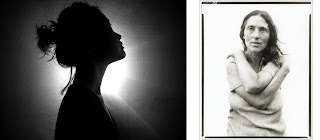
Now that you have brainstormed a few portrait ideas, it's time to shoot a roll of film and see how they turn out! Here's how to approach this:
1) Clarify your sketchbook ideas, and for each example you'd like to recreate: Identify the type of light you will use, (incandescent/studio lights vs. natural light/daylight), and if you decide to use studio lighting, create an illustration that shows your set-up: where will the camera, light source, and fills (if-necessary), be placed?
2) Consider equipment: What lights will you use, do you need a white/black background? Will you need a tripod?
3) Shooting tips: Partner up with a friend in class to help you with your set-up and to shoot your portraits. Use your sketchbook as a guide for explaining what you want. Nervous about shooting film? Use your digital camera first to see how successful your lighting and composition looks, and then shoot with film when everything looks good. Remember, slow exposures using shutter speeds slower than 1/30th of a second will be blurry if you hand-hold the camera! Check to make sure your focus is accurate as well!
4) Remember your shooting objective: You're creating a self-portrait that expresses how you would like to be seen, or how you think others might see you. Be creative with lighting, use of props, and most importantly composition! Remember, this portrait does not have to show your face, be thoughtful in how you choose to represent yourself! (Check out the slideshow below for additional ideas!)
Great tips to follow.
ReplyDeleteCheck out the 30 Day Photography Challenge @whitepeachphoto.com
I needed some help as to what a faceless portrait was.
Thanks.
Putting your link on twitter.